")


How to Create Magical Maternity Images with Digital Backdrops
Whether you’re photographing motherhood, maternity, or a creative portrait session, there’s something truly powerful about images that feel dreamy, soft, and just a little bit magical.
The best part? You don’t need a big studio or expensive props to create that effect.
With just a few simple tools—and the right lighting—you can transform your sessions and wow your clients every single time.
In this post, I’ll walk you through two of my favorite lighting setups:
One uses continuous studio lighting, and the other is a DIY natural light setup you can do right at home.
Both work beautifully with digital backdrops (yes—even when printed!) and are my go-to techniques for creating stunning, artistic images in my own studio.
Why I Love This Setup (And Why Clients Do Too)
These setups are my favorite for a reason: they’re quick, versatile, and create a luxurious, editorial-style result.
Clients are always amazed when they see the final gallery. It feels different. Elevated. Like something they’d expect to see in a magazine—yet it was created in a simple studio or even at home.
And as a mama myself, I know how special it is to slow down and create art that celebrates this season of life. These setups help me do just that, whether I’m working with first-time moms or capturing creative self-portraits.
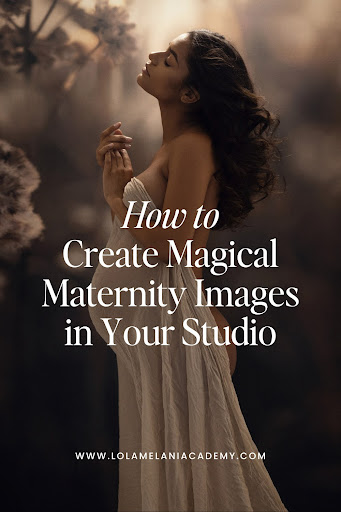
Studio Lighting Setup for Maternity Sessions Using Digital Backdrops
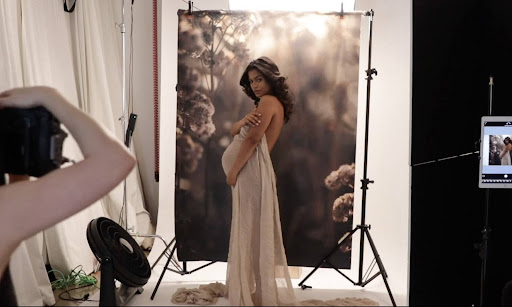
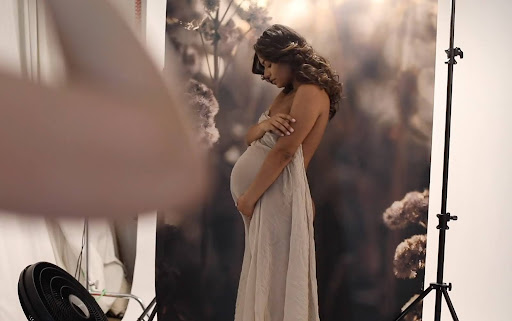
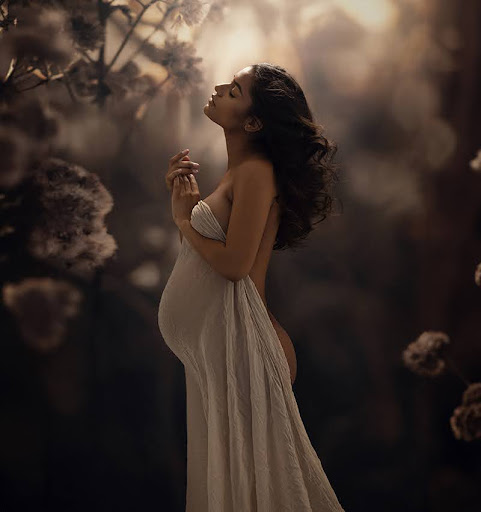
One of my favorite techniques to create that dreamy, ethereal look is backlighting. There’s something so soft, romantic, and magical about it—especially for maternity or motherhood sessions.
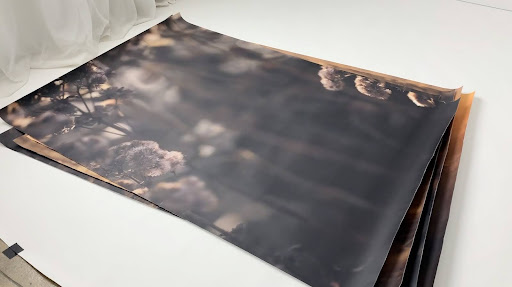
For this setup, I used a printed digital backdrop on canvas. The image? A macro photo I took of morning grass, enlarged to 50×70″. I love canvas because it has beautiful texture and is thin enough to let light shine through—perfect for backlit setups.
I placed a continuous LED video light behind the backdrop to illuminate it from behind. You can use any light source you have on hand—strobe, square softbox, or octabox. The goal is to let the light glow through the backdrop and softly wrap around the model, creating beautiful highlights in the hair and face.
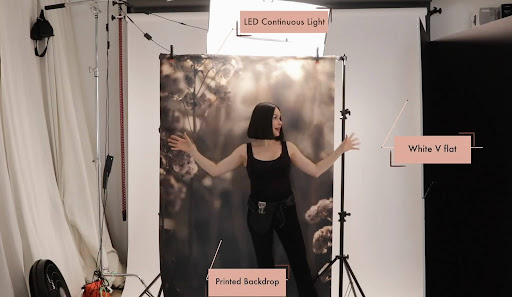
One of my biggest tips? Balance the exposure. You want the light behind the model to feel magical, not blown out. Add ambient light in your space to avoid creating a silhouette. In my studio, I bounce extra light using a white curtain and a V-flat placed camera-left. This helps to gently fill in the model’s face and body with light.
Camera Settings & Styling
I used:
- Camera: Canon 5D Mark IV
- Lens: 85mm f/1.4
- Settings: f/2.5, ISO 640, 1/125s
My model wore a simple silk drape, and I used a fan to create movement in the fabric and her hair. It gave the whole image a romantic, ethereal vibe—exactly what I envisioned.
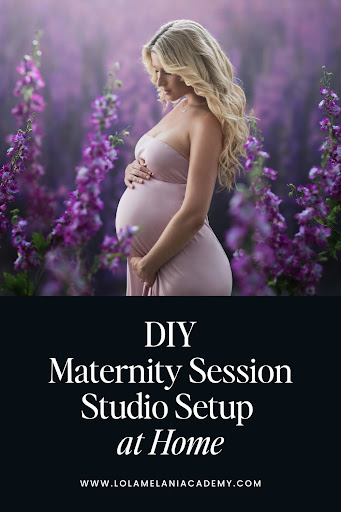
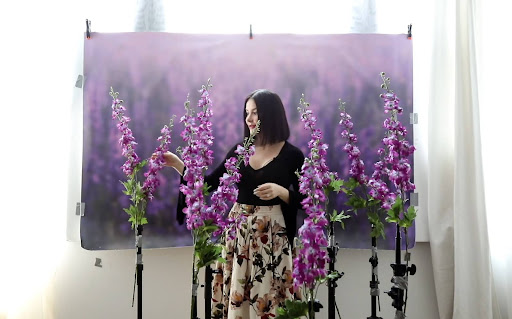
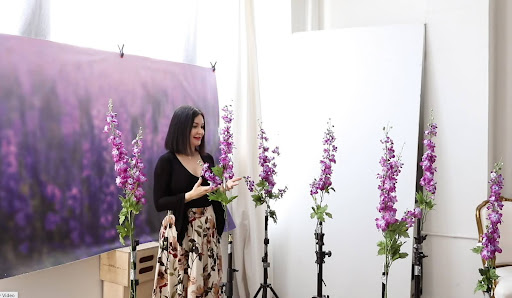
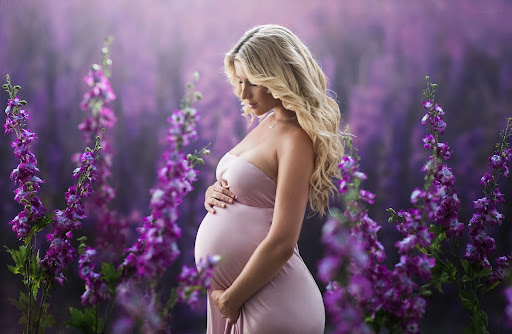
DIY Natural Light Maternity Session Setup at Home
Want to re-create a magical look at home using just natural light? You absolutely can.
For this setup, I used a large window in my studio with sheer curtains to diffuse the backlighting. If you’re shooting at home, a similar window with soft curtains works beautifully.
This time, I printed a digital backdrop of a flower field and taped it to a flat board for a more opaque look. I didn’t want the light to pass through—I was going for a more contrasted, painterly feel.
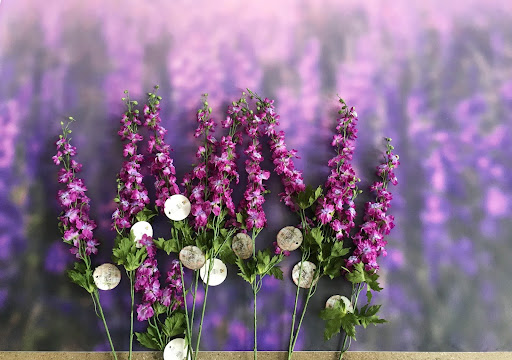
To add a realistic touch, I clipped about 10 purple delphinium silk flower stems to light stands and placed them in different planes around the model. This created a layered, immersive floral effect that photographed beautifully. Some flowers blurred in the foreground, while others were sharper, mimicking a real outdoor field.
Settings and gear
This setup was lit entirely by natural light from a large window, softly diffused through sheer curtains. The light was directional but gentle—perfect for creating that painterly look without any complicated gear. Just like the previous shoot, I used my Canon 5D Mark IV and 85mm f/1.4 lens, with settings of f/2.5, ISO 500, 1/125s.
Honestly, the result was stunning. Simple, natural, and elevated. And best of all—you can achieve it in any space with good light and a little prep.
Want to Try This Yourself?
If you’re feeling inspired to create this kind of magic in your own studio (or home!), I’ve curated a special Digital Backdrop Collection to help you get started.
These high-res files are perfect for printing or digital compositing, and they’re designed to elevate your portraits without the need for elaborate sets. Whether you’re shooting motherhood, maternity, or artistic self-portraits, this collection gives you the freedom to create something truly unique.